


")


eHow may earn compensation through affiliate links in this article.
As soon as September comes around, so do the fall decorations. This rustic wreath featuring an antique rake adorned with autumn foliage is the perfect home accent to greet your friends and neighbors. It's easy to make, and the results are cheery and spectacular — so get ready to rake in the compliments all season long.
Video of the Day

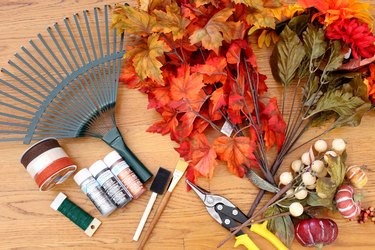
Things You’ll Need
-
Rake head
-
Silver acrylic paint
-
Black acrylic paint
-
Rust acrylic paint
-
Paintbrushes
-
Artificial fall leaves
-
Wire cutter
-
Floral wire
-
Artificial fall flowers
-
Fall floral picks
-
Ribbon
Step 1: Distress the Rake
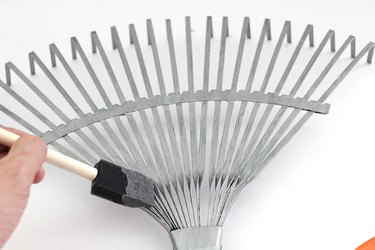
If you don't have an old rake to craft with, you can purchase a new rake for a few dollars and distress it with paint. That's what I did, since I don't have a rake — or a yard, for that matter. To give the new rake head an antique patina, start by covering it with silver acrylic paint.
Then place some black and rust acrylic paint on a paper plate and gently swirl the colors together.
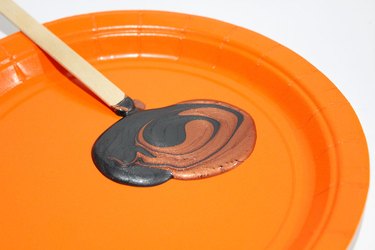
Dip a paint brush in the mixed paint and dab the brush all over the rake. Use an up and down motion with the brush. You'll get varying globs of black and rust colors throughout the rake that will look like signs of aging and rust. The more uneven your paint job, the better and more realistic the antique finish will be.

Step 2: Decide on Rake Orientation
Decide if you want your rake tines to face outward (toward you) or inward (toward the door). The advantage of having them face outward is the rake will be flush with the door. However, because the tines will be sticking out, you have to be careful not to poke someone in the eyes with them. I recommend that the tines face inward because, although the rake won't be flush, the extra space between the tines and the door will be perfect to hide the wires holding the wreath together.

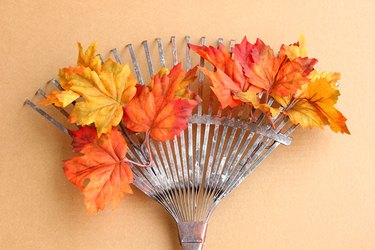
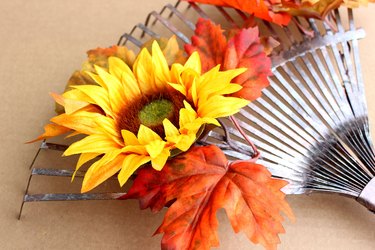
Step 3: Add Leaves
While you can use freshly fallen leaves from the yard, they will turn brittle and not hold up in the wreath. Artificial leaves, which are usually sold in bunches at the crafts store, are more durable. With a wire cutter, cut off small groupings of the leaves.
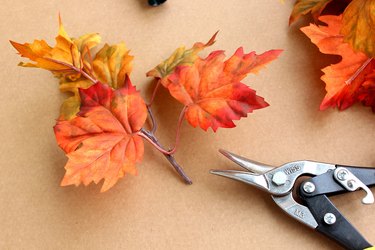
Position the leaves on the rake. Slide the stem of the leaves between two rake tines.
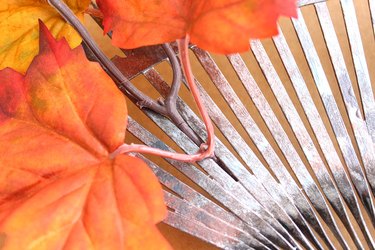
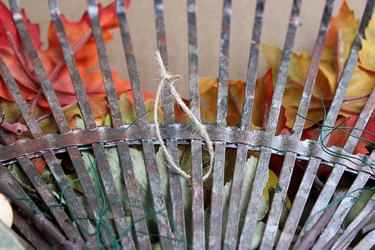
Flip the rake over and attach the stem to a rake tine with a piece of floral wire. You will get a tighter grip by twisting the wire rather than tying it.
The leaves serve as a backdrop for the other fall elements of the wreath. Just attach a few leaves to start — you can always add more later.
Step 4: Add Flowers
Fall flowers are typically yellow, orange or red, and you can find many varieties of artificial ones in your local crafts store. I love sunflowers for this wreath because their large, bold blooms give the wreath a strong focal point. As with the leaves, use a wire cutter to remove the flowers from their bunches, leaving about four inches of stem.
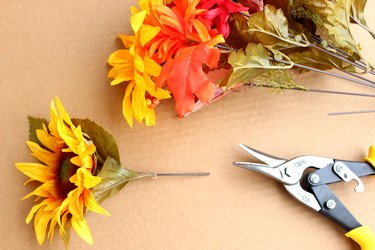
Insert the stem of the flowers between the rake twines, and secure them in the back with wire.

Because the blooms can be top-heavy, wire the stems in two places for extra security — once near the flower head and again lower on the stem.
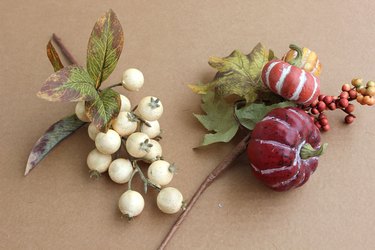
Step 5: Add Fall Accents
Once leaves and flowers have been attached to the rake, the finishing touch will be fall accents like artificial pumpkins and berries. The easiest accents to purchase are floral picks, which are elements that have already been grouped for you, with their stems wrapped in tape. You'll find these right next to the flower stems in the crafts store.
Position the floral picks on the rake where you want them. The wrapped stems are typically too thick to squeeze between the tines, so they can rest on top.
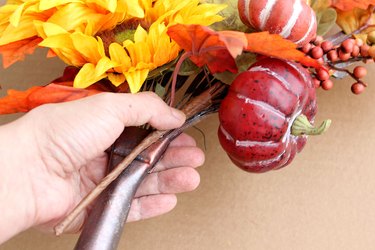
Wire the stem to a rake tine beneath or adjacent to it.
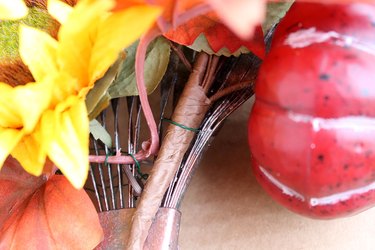
Step 6: Fill in Gaps
We don't want to cover the entire rake with floral elements, as the distressed rake is an essential part of the wreath. However, I don't like to see naked stems; if there are portions that show too many stems, it's a good idea to hide them.

Just squeeze some extra leaves in the gaps, and secure them in the back with floral wire. Look, no wayward stems.

Step 7: Tie a Ribbon
Tie a ribbon around the base of the rake head. In the spirit of not covering too much of the rake, push the ends of the ribbon to one side so the handle of the rake is exposed.

Step 8: Tie a Hanging Loop
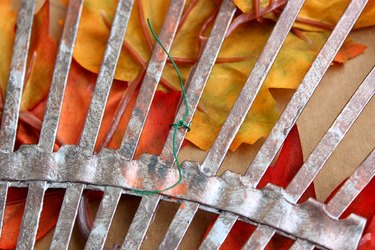
With string or more floral wire, tie a loop in the back for hanging. Make sure it can't be seen from the front.
Step 9: Display the Wreath
During fall, most people associate rakes with weekend chores. But in the context of this colorful wreath, you'll have a whole new appreciation for what a rake can do.


