")


eHow may earn compensation through affiliate links in this article.
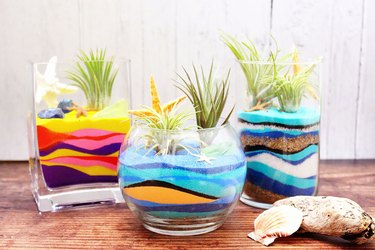
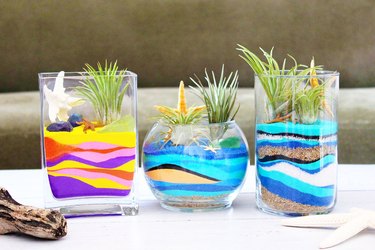
With its swirling layers of color, sand art is fun to create and gorgeous to behold. And when you top it off with tillandsia air plants, sand art can be the vibrant foundation of a glass terrarium. For a bold, modern look, choose sand colors that pop like pink, yellow and orange. Or, for a beachy vibe, select blues and turquoise. You can even use the sand to a draw a beach scene featuring an ocean, island and sky — and it's a lot easier than you'd think!
Video of the Day
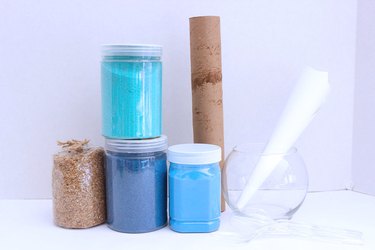
Things You’ll Need
-
Glass container
-
Sheet of cardstock
-
Tape
-
Empty paper towel roll
-
Plain sand
-
Colored sand
-
Spoons
-
Tillandsia plants
-
Starfish, shells and rocks
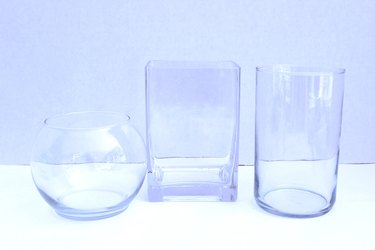
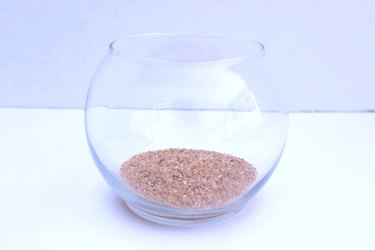
Step 1: Select a Container
Choose a clear glass container that is at least as tall as it is wide. The container needs to be deep enough to hold several layers of sand, plus the tillandsia plants.
Step 2: Make a Funnel
Roll up a sheet of cardstock to make a funnel. Secure the edges in place with tape. This funnel will make it easier to pour the sand exactly where you want it.

Step 3: Pour a Base Layer of Sand
Start by pouring about a half inch of sand to the bottom of the container. The main purpose of this base layer is to help hold up the empty paper towel roll in the next step.
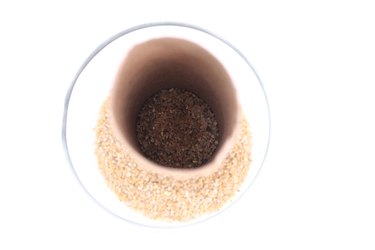
Step 4: Insert a Paper Towel Roll
Using scissors, cut an empty paper towel tube so you have a piece that is taller than your container.

Position the paper tube standing up in the middle of the glass container, using the sand already in there to hold it steady. Then drop the funnel in the tube.

Step 5: Fill the Tube With Plain Sand
Using the funnel as a helpful guide, pour some plain sand into the cardboard tube with a spoon, making sure you don't go higher than your intended top level of sand. Having sand in the tube serves two purposes. First, because the sand in the middle core of the container will not be visible, it's more cost effective to fill it with plain rather than colored sand. Second, filling in the sides with colored sand, and creating designs with it, will be easier if we don't have to worry about filling in the middle as we pour.
Tip
If the container your sand comes in has a lip that makes it easy to pour, you can bypass the spoon and just pour directly.
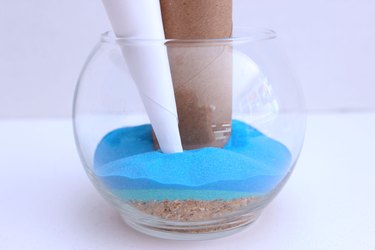
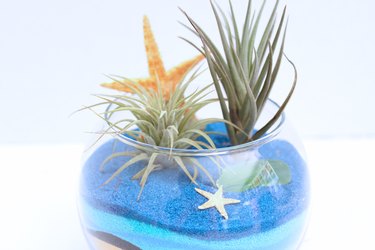
Step 6: Pour Layers of Sand
In this example, I will demonstrate how easy it is to draw a seascape. Position the tip of the funnel between the glass and the cardboard tube. Spoon blue sand into the funnel, and move the funnel around to direct the sand.
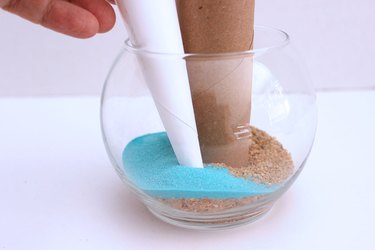
You'll need at least two layers of different blue sand to represent the ocean. Notice the base layer of sand looks like the beach.
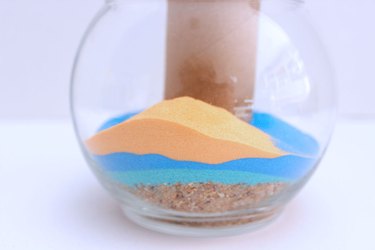
Step 7: Draw Islands
To create an island in the middle of the ocean, we want to draw a mountain coming out of the water. To do this, use the funnel to direct a heap of gold-colored sand on top of the blue sand. Turn the container around and create an island on the opposite side, if you'd like.
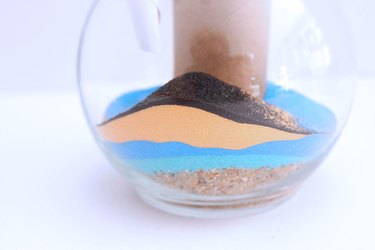
To help the island stand out, pour a thin layer of black sand on top of the gold, again using the funnel to direct the sand.
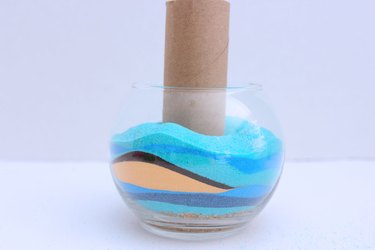
Step 8: Add the Sky Layers
Add a few layers of different blues on top of the black sand to create the sky. The more uneven the layers, the better — the wavy lines look more dynamic. And don't go too high in the container. You want to leave room for the tillandsia plants.
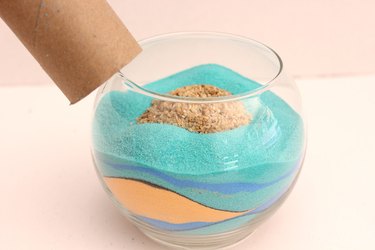
Step 9: Remove the Cardboard Tube
When you have reached the intended final height of your sand layers, pull the cardboard tube out of the container. The plain sand housed in the tube will remain.
Cover up the plain sand with a thin layer of colored sand on top.

Step 10: Hydrate the Tillandsias
Tillandsia plants are air plants that don't need roots to thrive. When you purchase them at the store, they might not have been hydrated for a while, so submerge them in water for about 20 minutes.
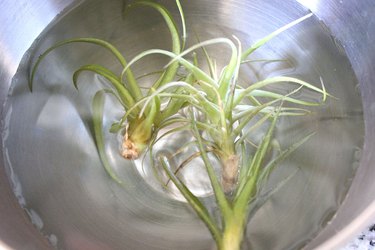
Let them dry on a paper towel for about an hour to soak up excess moisture.

Step 11: Add Tillandsias to Container
Nestle one or two tillandsias in the container on top of the sand. Use the sand to hold the plants steady.
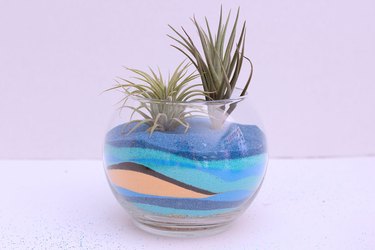
Add starfish, shells or rocks around the tillandsias to finish off your design.
These terrariums are functional art pieces that capture the beauty of sand and nature. Experiment with different colors for different seasons, or throw a terrarium party where everyone gets to make their own.