


")


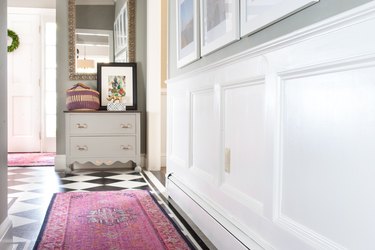
Wainscoting is one of those details in a house that takes a space from builder-grade and rather ordinary to high-end with lots of charm and character. It can be expensive to hire this kind of work out, but with careful measuring, attention to detail and basic use of a saw, you can do it yourself for a fraction of the cost.
Video of the Day
Things You’ll Need
-
Tape measure
-
Pencil
-
Laser level and/or hand-held level
-
Small pry bar
-
Semi-gloss interior paint
-
Paintbrush
-
Paint roller
-
Paint tray
-
Miter saw
-
One-by-four moulding
-
Nail gun (recommended) or hammer
-
Two-inch brad nails (either for nail gun or for use with the hammer)
-
Shoe moulding
-
Nose moulding
-
Cove moulding
-
Spackle or wood filler
-
Caulk
-
Caulk gun
-
Pad sander or sandpaper (fine grit for either)
*To estimate the amount of materials you'll need for this project, please reference the Tip at the end of this article.
Step 1: Mark the Height of the Chair Rail
Use a tape measure to measure the height from floor to ceiling. Divide that number by three and mark that height up from the floor on the wall with a pencil. For example, for a nine-foot ceiling you would mark three feet up from the floor. Use a laser level or standard hand-held level to mark a level line across the length of wall where the wainscoting is going to go. Draw this line right on the wall with a pencil. Measure the width of the nose moulding (usually five-eighths of an inch) and mark another line five-eighths of an inch underneath the first one.

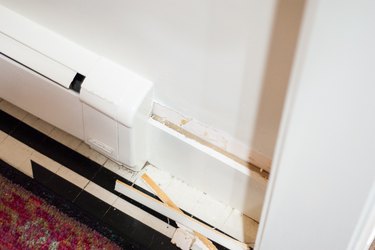
Step 2: Remove Any Curved Moulding on the Baseboard
Many baseboards are made up of a flat piece of moulding on the bottom and a curved piece on top. If you have the curved piece, use a small pry bar to pull it off.
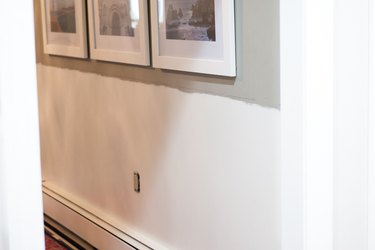
Step 3: Paint the Wall Surface
Paint the wall surface using a brush and roller up to the bottom level line drawn on the wall. Make sure you can still see the line for moulding placement later. Semi-gloss interior paint gives the most traditional look for wainscoting.
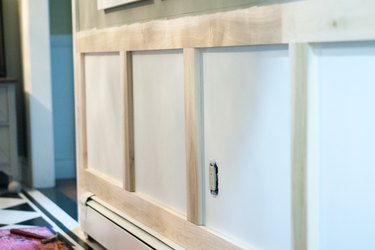
Step 4: Measure, Cut and Nail the Horizontal One-by-Four Pieces
Often, the existing baseboard can be used as the bottom piece of the wainscoting, but if you are working around something (like the electric baseboard pictured in this project), measure both the bottom length of the wall and the top length (along the lower of the pencil lines). Use a miter saw to cut a one-by-four for each place. Attach the one-by-four(s) to the wall using a nail gun or a hammer and two-inch brad nails. The top edge of the top one-by-four should sit right on the lower of the two pencil lines you drew on the wall.
Step 5: Measure, Cut and Nail the Vertical One-by-Four Pieces
Measure the height between the top and bottom one-by-fours on both the far left and the far right sides. Cut one-by-fours to those measurements and nail in place. To determine placement of the remaining vertical one-by-fours, measure the length between the left and right vertical pieces and place pencil marks on the wall at even intervals.
There is no standard distance between pieces, however the space between the vertical one-by-fours is often somewhere between eighteen and thirty inches. In this project, spacing of approximately twenty-five inches was used.
Use a level to draw level vertical lines where you have marked, then measure those lines from the top one-by-four to the bottom one-by-four to determine the length to cut the remaining pieces. Cut the one-by-fours and nail to the wall over the level lines.
Tip
Most houses are not perfectly level so make sure you measure each vertical line separately. They will most likely vary by small amounts.
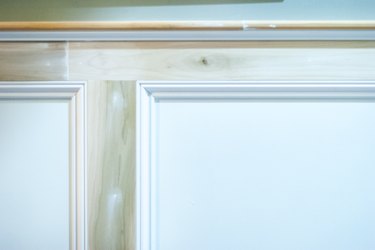
Step 6: Measure, Cut and Nail Shoe Moulding
Shoe moulding is the curved moulding that sits inside the boxes made by the one-by-fours. Measure the inside lengths of the four sides of each box. Cut the shoe moulding to these measurements, making sure the cuts at each end are at a forty-five degree angle. Nail the shoe moulding inside the one-by-four boxes.

Tip
Shoe moulding has a taller side and a shorter side. The taller side sits right up against the one-by-fours for each box. When measuring, make sure that the cut length matches what you have measured on the taller side, not the shorter side — the taller side should be longer than the shorter side because of the angled cut.
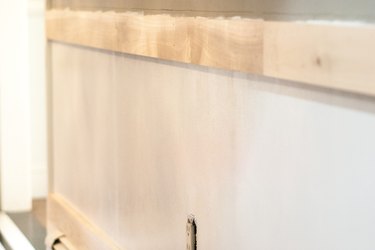
Step 7: Measure, Cut and Nail the Nose Moulding
Measure the length above the very top horizontal one-by-four. Cut the nose moulding to this length and nail to the wall so it sits right on top of the topmost horizontal one-by-four.
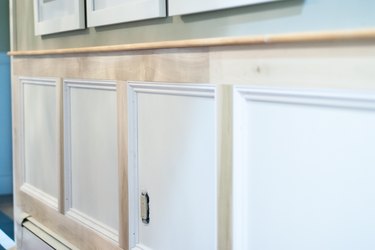
Step 8: Measure, Cut and Nail the Cove Moulding
Measure the length underneath the nose moulding and cut a piece of cove moulding to this size. Nail in place directly underneath the nose moulding.
Step 9: Fill Nail Holes, Cracks and Gaps
Fill any nail holes or cracks with wood filler or spackle. Caulk around any sides of moulding that have gaps between the moulding and the wall. Let everything dry, then sand the wood filler or spackle with fine grit sandpaper or use a pad sander with fine grit sandpaper attached. Wipe away any dust.
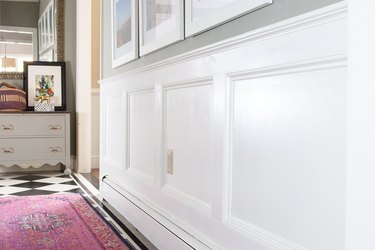
Step 10: Paint the Wainscoting
Use a brush and semi-gloss interior paint to paint the wainscoting. Usually two or three coats give the best coverage.
Tip
The amount of moulding needed for this project will vary greatly depending on the amount of wall to be covered with wainscoting, but there are some general rules of thumb you can follow to help estimate materials.
For the one-by-fours, measure the length of the wall(s) to be covered and multiply by two (if you are going to be using the existing baseboard as the bottom piece of the wainscoting, just use the single measurement, not doubled). For every eight feet of horizontal length, add another twelve feet to account for the vertical pieces. So, for an eight-foot span of wall where you need materials for the top, bottom and vertical pieces, you would need (8 x 2) + (12 x 2) = 16 + 24 = 40, i.e. forty feet of length. One-by-fours often come in either six-foot or eight-foot lengths so divide the final number by either six or eight to get the number of boards you will need to buy. If you get a decimal, always round up to be sure you have enough!
To determine the amount of shoe moulding, start with the horizontal measurement you took of the wall. For every eight feet of wall, plan on around twenty-four feet of shoe moulding. Again, it's usually a good idea to round up and/or buy a little extra to make sure you have enough.
The amount of both nose and cove moulding will just be the same as the horizontal measurement you took of the wall. Round up slightly so you have some room to make any necessary cuts.


