


")


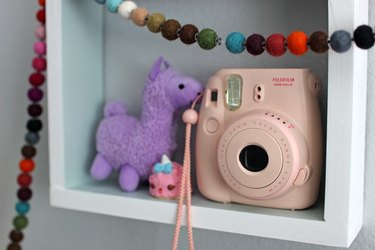
This DIY wall box shelf is simple, budget-friendly and key to any space. It conveniently provides more storage to your room, as well as chic decor. Here's how to make it!

Video of the Day
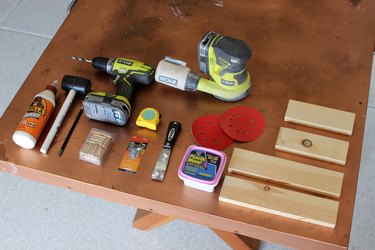
Things You’ll Need
-
Two pieces 12" x 2.5" (I used scrap wood)
-
Two pieces 8"x 2.5" (I used scrap wood)
-
Wood glue
-
Wood filler
-
Putty knife
-
Fluted dowel pins or a small dowel cut down
-
1/4" wood drill bit
-
Rubber mallet
-
Painters tape
-
80 and 120 grit sandpaper
-
Stain or paint of choice
-
Two picture hangers of your choosing
Step 1: Lay Pieces Out
Lay pieces out, keeping the longer pieces on the outside of the shorter pieces.

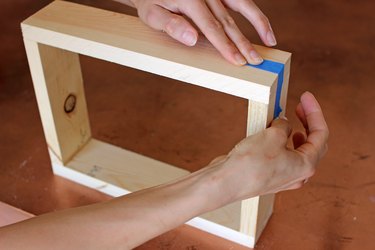
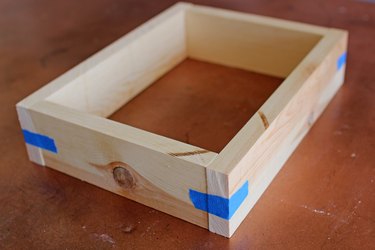
Step 2: Glue
Add wood glue along the edges where the corners meet and firmly press together.
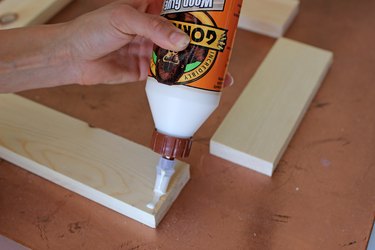

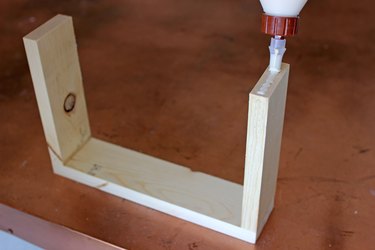
Add masking or painters tape down the center of each corner.
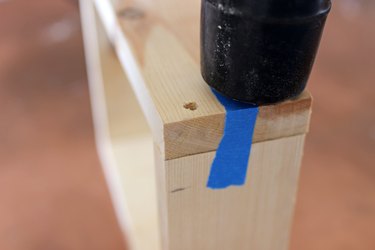
Step 3: Measure + Mark for Holes
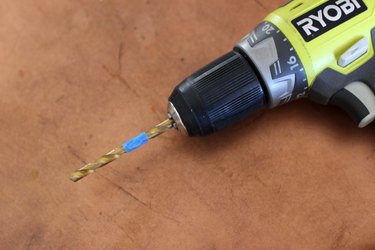
Place one dowel piece flush to the edge of the wood. Make a small mark and measure on your drill bit from there, or measure the dowel piece up against your bit directly.
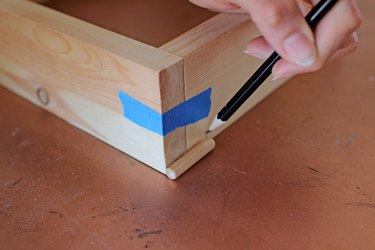
Place tape along the drill at the length of the dowel piece. This is a simple DIY guide to let you know where to stop when drilling the holes where the dowels will be inserted.
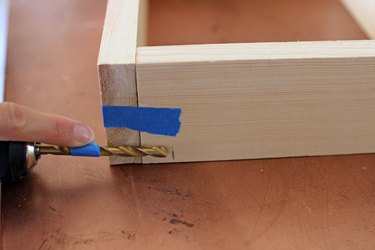
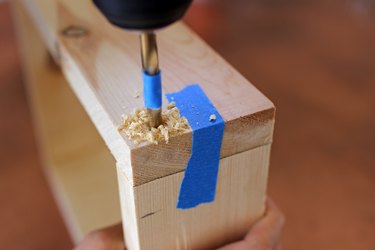
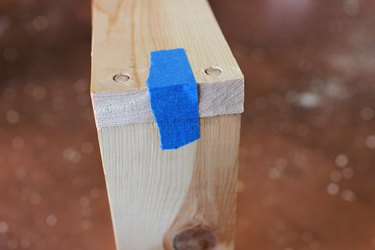
Step 4: Drill Holes + Insert Dowels
Working corner to corner, drill one hole on each side.
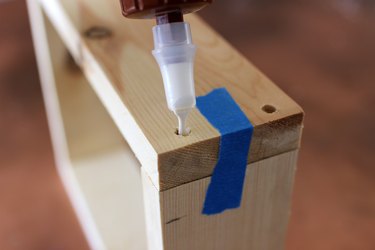
Add a drop of wood glue to each hole.
Insert a dowel piece into each hole.
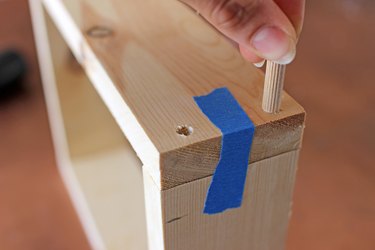
With a rubber mallet, hammer the dowels lightly into place until they are flush.
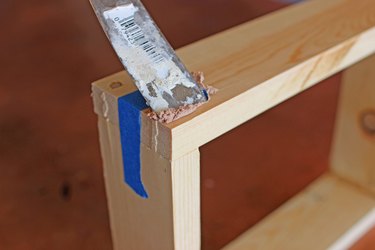
Step 5: Add Wood Filler
Add wood filler to cover up any blemishes that may have occurred during the process.

Step 6: Sand Smooth
You can do this by hand but an orbital sander will make your life a bit easier and your arm not so sore in the morning. Starting with an 80 grit and sand down every part of the shelf.
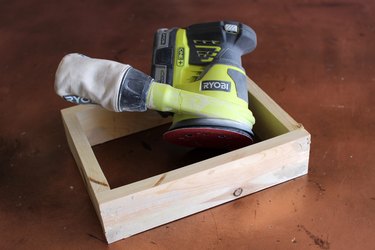
Repeat that same sanding process with a 120 grit until silky smooth.

Step 7: Stain or Paint
Depending on paint or stain, be sure to follow the instructions on the label to ensure you are applying properly. Mixing it up is fun! Try adding one color to the outside and another color to the inside.


Step 8: Add Hanging Brackets
Install the hanging brackets of your choice. Adding a hole into the wood where the nail will go is always helpful to keep the shelf as flush to the wall as possible.


Step 9: Hang on Wall
Hang the shelf onto your wall and enjoy!

How easy was that? Sometimes woodworking builds are a bit intimidating, but this one is so simple, any level of DIY'er can execute. Happy DIY'ing!


