


")


eHow may earn compensation through affiliate links in this tutorial.
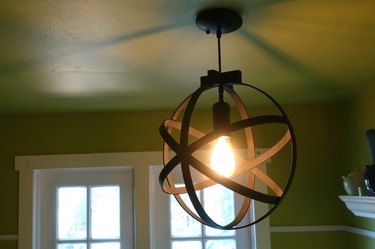
Can you believe that the materials for this on-trend, industrial-style pendant light cost me around $30? I'm still trying to get over it myself. What's more, it took less than an hour of work (not including the time it took waiting for the wood glue to dry) to whip this bad boy up. Not only will you have a stellar focal piece for your room, but you can pat yourself on the back knowing that you made it yourself using unconventional materials.
Things You’ll Need
-
14" embroidery or quilting hoop kits that have wooden blocks for the tightening hardware, like these, (2)
-
Pendant light kit (I used this one)
-
"Edison" bulb for that vintage industrial look
-
Small wood block cut to the length and height of the hoop's hardware blocks (more on this in the instructions below)
-
Drill with 3/8 inch drill bit
-
Wood glue
-
Spray paint or wood stain
-
Mini spring clamps
-
Bar clamp
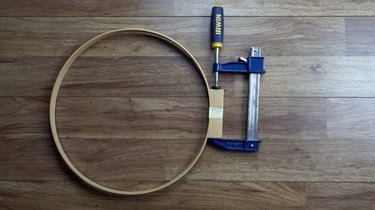
Step 1
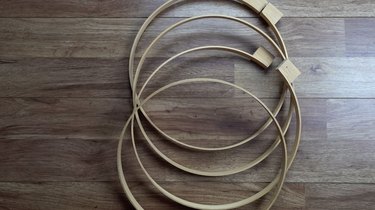
Remove the hardware from both hoop sets and separate the hoops.
You'll have four total — two unjoined outer loops with hardware blocks attached at the opening, and the two inner hoops.
Step 2
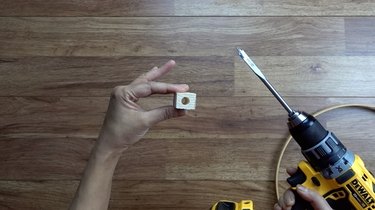
Drill a 3/8 inch hole in a small wooden block. The dimensions of the block should roughly match the width and height of the hardware blocks of the embroidery hoops (see images in step 3 below). You'll use this block to join the two unjoined hoops together, feed the lighting wires through, as well as to stabilize the light bulb so that it hangs in the center of the orb.
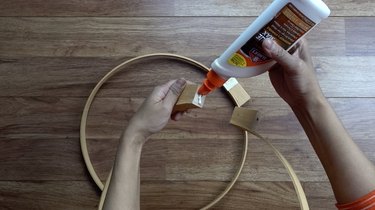
Step 3
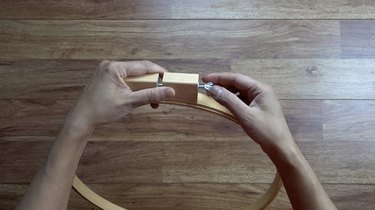
In this step, you'll join one of the unjoined outer hoops together by gluing both ends to the small wooden block you drilled in the previous step. Start by applying wood glue to one end of the hoop (on the hardware block) as shown below.
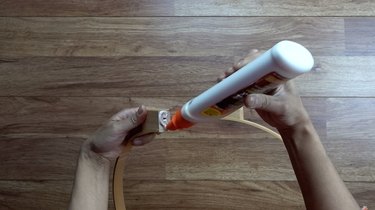
Then attach the small wooden block (with the hole facing upward) to the end of the hoop.
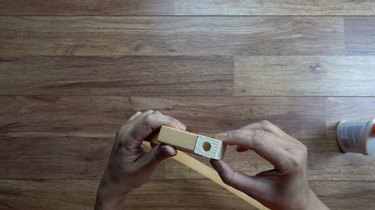
To finish joining the hoop, apply glue to the other side of the block and attach the opposite end of the hoop.

Your first outer hoop is now joined.
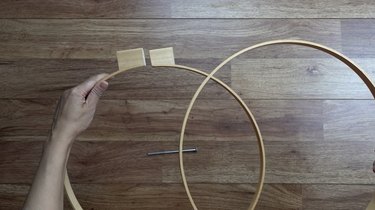
Step 4
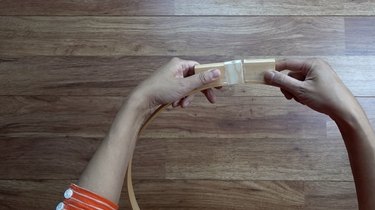
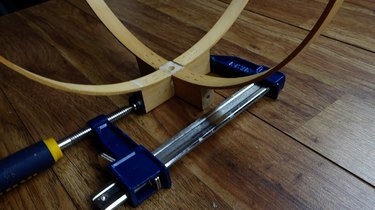
Secure these glued joints using your bar clamp, as shown below. Tighten the clamp and let the glue fully dry (refer to the curing time indicated on the product label).
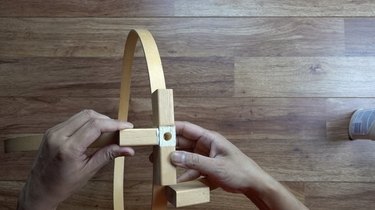
Step 5
Once the first outer hoop is set, remove the clamp and repeat steps 3 and 4 using the same wooden block and the second unjoined outer hoop so that the hoops are perpendicular to each other, as shown in the photos below.
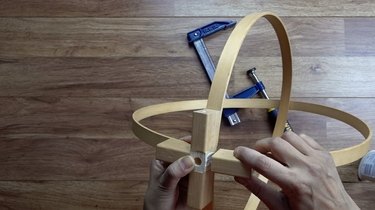
Step 6
As before, you're going to clamp these newly-created joints together in your bar clamp. Set the clamp on a level surface, invert your orb, place the newly-glued portion in between the clamp, and tighten (see images below). Proceed immediately to step 7.

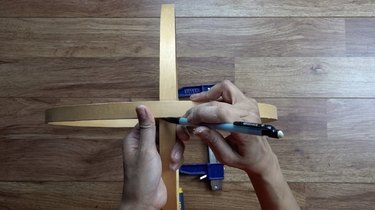
Step 7
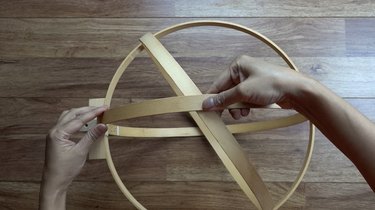
With the orb's top joints clamped and the orb inverted, you'll now connect the hoops at the bottom of the orb. Position the hoops so that they're perpendicular to each other, then use a pencil to mark the innermost hoop's position as shown.
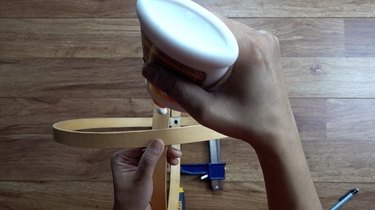
Apply glue to the hoop between the marks, then join and secure using your mini clamps. Leave all clamped joints to dry before proceeding to step 8.
Step 8
Remove the clamps and insert one of the inner hoops inside the two outer hoops. You'll need to bend the hoop slightly to get it inside, but be gentle to avoid splintering the wood.
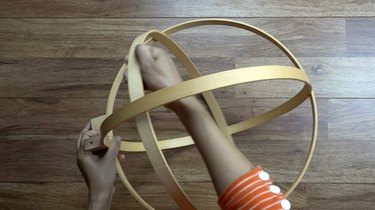
Position the hoop so that it sits at an approximate 45 degree angle from one of the outer hoops, as show below.
Clamp to hold it in place.

With the third hoop clamped in place, invert the orb so that the joint directly opposite the clamp is facing up. Mark, glue, and clamp this joint as you did in step 7. Then, invert and glue the previously clamped joint.


Leave to cure before proceeding to the next step.
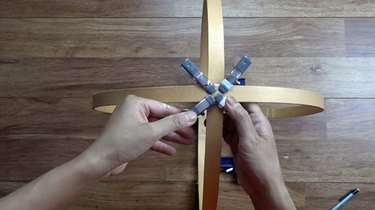
Step 9
Just one more hoop to add and your orb is assembled! Insert your fourth hoop and position it as shown below. Note that on two opposite sides of the orb, all four hoops should intersect to form an asterisk pattern. Repeat the same marking-gluing-and-clamping process for the fourth hoop as you did for the third hoop.

Once again, leave the orb to dry.
Tip
At this stage, you can choose to glue and clamp every single joint around the surface of your orb, or simply leave as is if you don't mind the inner hoops having a "floating" appearance inside your orb. Depending on how stiff your particular embroidery hoops are (some types are more flexible than others) you may find it difficult to stretch and connect your hoops at every joint around the orb.
Step 10
Time to paint or stain your orb! I wanted a wrought-iron appearance, so I chose a black paint with a matte finish.


Allow the paint or stain to dry completely.
Step 11
It's now time to connect your orb to your pendant light. Before you can feed the pendant light wires through the 3/8 inch hole at the top of the orb, you'll have to unscrew and detach the ceiling mounting plate that came with your light kit.

Once the plate is removed, feed the wires through the 3/8 inch hole at the top of the orb and pull through until the orb rests on the top of the light.

Finally, reattach the mounting plate and your orb pendant light is ready to install, according to the lighting kit's instructions.

Warning
Before installing any ceiling light, go to the main fuse box and cut the power off of that room. We also highly recommend using an electric circuit tester as well to ensure that it is, in fact, off. You don't want to get zapped! If you're not confident about doing the task yourself, your safest bet is to call in a professional electrician.
Congratulations DIYer — you've now seriously upped your mood lighting game!


The idea for this project comes from this ingenious tutorial. We so excited for the way this light turned out!


